Besides wifi coverage around the whole dorm has each room wired connection via ethernet cable. Unfortunately, we cannot provide cables, and everyone has to get their own. You can buy these in most electronics stores (for example czc.cz). We would not recommend physical stores, as they usually charge up to 5x the price online stores do. To be able to connect with a cable to the dorm network, users of Windows OS must enable 802.1x protocol, which is by default turned off. Manual for Windows 7+ is below, in case of different operating systems, please, use google.
Windows
Automatic configuration
Configuration can be automatic using our script windows-setup, that you need to unpack and run as administrator.
- Connect your cable to the network and your computer. (not always necessary, but some devices do not show your adapter unless it is in use)
- Right-click on file setup.bat and select “Run as administrator”.

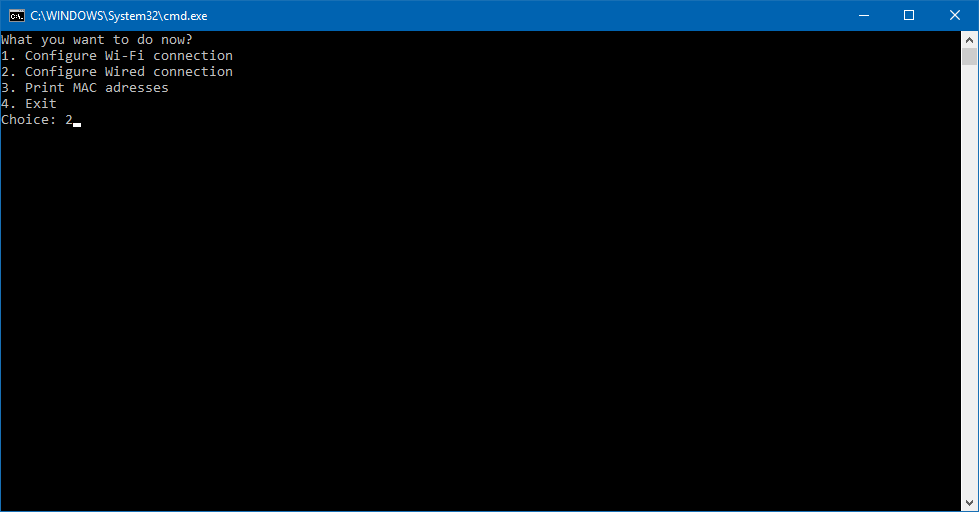
- Now script ask you what you want to do. To setup wired connection type 2 and press key Enter.
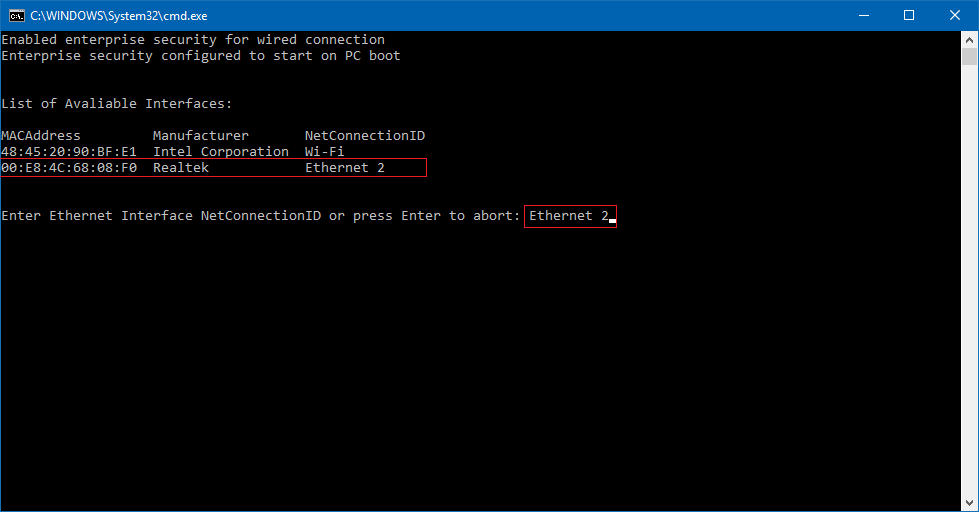
- In next spet you have to tell to the script name of interface which you want to configure (usually named as “Ethernet …”, or “Local Area Connection …”).
Type the interface name (in example “Ethernet 2”) and press key Enter.
- If interface was successfully configured you will fall back to screen from step 3.
Type 4 and press key Enter to terminate the script.
Manual configuration
If automatic configuration did not work for you for some reason, or you do not like to run foreign scripts on your computer, follow manual below.
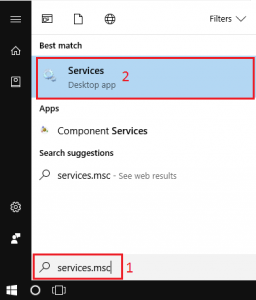
- Click on start and type services.msc, enter.
- In window Services locate item called Wired AutoConfig (may vary depending on your windows language pack, English and Czech ones are this)
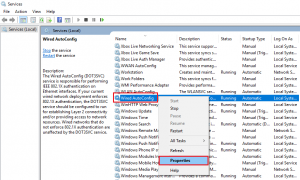
- Right click the item and and pick properties.
- Select automatic startup type and click start to run the service.
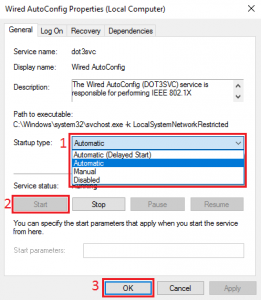
- You can now close services window.
- Connect your cable to the network and your computer. (not always necessary, but some devices do not show your adapter unless it is in use)
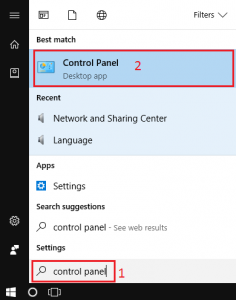
- Click on start, type Control panel, enter.
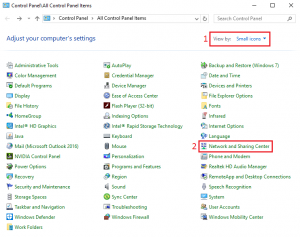
- In right upper corner select small icons, and continue to Network and Sharing Center.
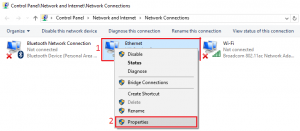
- Select Change adapter settings in left menu.

- Find ethernet adapter in detected devices, right click on it and continue to properties.
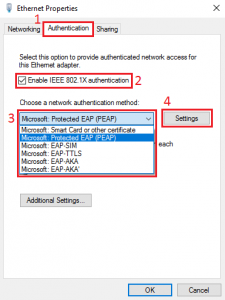
- In Authentification bookmark check IEEE 802.1X authentification, set network authentification method to Microsoft: Protected EAP (PEAP), and click on settings button.
- Make sure server’s identity verification is off.
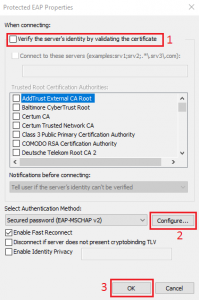
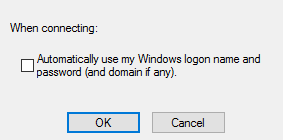
- Under configure button make sure windows logon credential use is off.
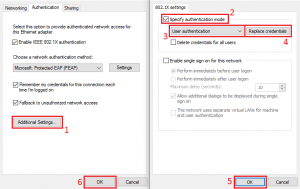
- As the last step, your credentials need to be set. Back in Authentification bookmark select Additional settings, check Specify authentification mode, select User authentification, and under Replace credentials button fill in your credentials (identical to your RUPS and Wifi credentials)
Linux – Ubuntu, NetworkManager
It is usually best to obey the instructions of your network manager. The connection settings might be a bit difficult to fill correctly; thus, the following settings for NetworkManager are recommended:
- Security: WPA2-Enterprise
- Authentication mode: Protected EAP (PEAP) or TTLS
- MSCHAPv2, or PAP for TTLS
- CA certificate can be downloaded from CESNET(link is external) (TERENA SSL CA 3). It is usually required for successful connection.
- User name and Password – does not require explanation 🙂